Transfer everything from old computer to new computer with Windows 11
Transfer programs and files to new computer
Transfer files from one computer to another
Transfer Microsoft Office to new computer
Restore programs and files from a broken or dead computer
Transfer directly from an old hard drive
Transfer to new computer using a USB hard drive
Corporate Windows 11 migration
User Profile Migration to new PC / new domain
How To Migrate Local Profiles to Azure AD
Migration to Server 2019 / 2016
Transfer programs and files to new computer
Transfer files from one computer to another
Transfer Microsoft Office to new computer
Restore programs and files from a broken or dead computer
Transfer directly from an old hard drive
Transfer to new computer using a USB hard drive
Move To New PC - Compare Options
Migration Kit Pro - Advanced Transfer
Transfer programs and files to new computer
Transfer files from one computer to another
Transfer Microsoft Office to new computer
Restore programs and files from a broken or dead computer
Transfer directly from an old hard drive
Transfer to new computer using a USB hard drive
Updated February 2026 · 3 minute read
How to transfer programs and files to Microsoft Surface
Got a new Microsoft Surface or Surface Laptop? In this article, we will see how to transfer your programs and files from your old PC to your Surface. The transfer will preserve your programs, settings, documents, pictures, music, movies, favorites, wallpaper and the rest of your stuff, even when the old computer runs an older Windows, such Windows 10, 8, or 7. Transfer from Windows 10 to Windows 11 is fully supported, for example. (If you don’t have a Surface, see here for the general tutorial)
As with any computer or tablet, the first thing to do with the Surface is to get it installed and personalized. This means installing all your programs, configuring all your settings and then copy all the files. This is a lengthy process, not to mention that you may not have the old disks and not remember which settings you have always used. Fortunately, there is an easier way to transfer – using a dedicated tool called Zinstall WinWin, which can transfer programs, settings and files automatically and completely.
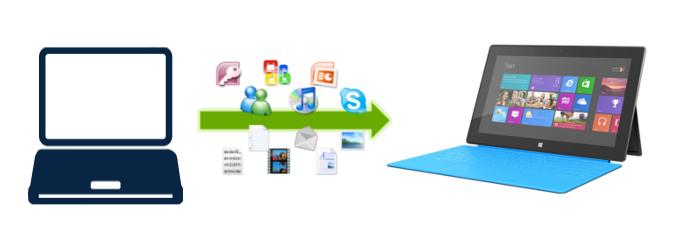
There are 3 parts that are important to the transfer:
- Files, such documents, pictures, music, pictures and emails
- Settings, such as user profiles, emails, accounts, passwords, favorites, bookmarks, wallpaper and other personalization
- Programs, such as transferring Microsoft Office, Adobe Photoshop, Quickbooks, TurboTax, Firefox, Chrome, and other programs to the new computer
How to transfer programs and files to Microsoft Surface
- The first stage in the transfer is deciding how to connect with the Surface. Since it does not have an Ethernet port, there are 3 options: wireless transfer, using a USB drive or using an Ethernet adapter.
- The simplest option is to simply have the Surface connected to your wireless network. The Zinstall WinWin tool will then be able to transfer over that network. The downside of that is that wireless transfer is slower than other options, but it will get the job done.
- A faster option is to use a USB drive to perform the transfer. In this scenario, you would use the Zinstall Migration Kit Pro, to first perform a full backup of your old computer to the USB drive, and then connect the USB drive to the Surface and restore programs and files to it. A USB 3.0 drive will be even faster.
- Finally, you can also get an Ethernet adapter for the Surface (see here for Microsoft’s guide on this). It will get a fast transfer rate, and the only downside is that you have to spend money on the adapter itself.
- Once you have your Surface connected to your network, wirelessly or with a cable, run Zinstall WinWin on your old computer (the one you are transferring from) and on the Surface.
Note: You can download WinWin here, and its user guide here. - You don’t need to do any configurations for the computers to connect – it’s automatic.
- If you’d like to select which applications and files you want to transfer, press the Advanced menu on the Surface’s screen. If you just want to transfer everything, you don’t need to go to the Advanced menu.
- Press “Go” on the Surface to start the transfer.
Ready to transfer everything to your new Microsoft Surface?
Video tutorial – how to transfer programs and files to Microsoft Surface
guarantee Buy now